Setelah selesai Membuat Elemen Header, sekarang mari kita lanjutkan bagaimana pula cara menambahkan elemen Sidebar template blog dari awal (jangan lupa sebelumnya pahami juga: Apa Itu Sidebar Blog, Fungsi dan Contohnya).
Langkah awalnya sama dengan sebelumnya. Silahkan masuk dulu ke dasbor blog anda kemudian buka form Edit HTML Template blog anda. Script yang akan anda sisipkan ke dalam template adalah:
<div id='sidebar-wrapper'>
<b:section class='sidebar' id='sidebar' showaddelement='yes'></b:section>
</div>
<b:section class='sidebar' id='sidebar' showaddelement='yes'></b:section>
</div>
Kemudian sisipkan semua script tersebut diatas main blog, tepatnya di atas kode ini:
<div id='content-wrapper'>
Sehingga bagan lengkapnya akan menjadi seperti ini:
<?xml version='1.0' encoding='UTF-8' ?>
<!DOCTYPE html>
<HTML>
<head>
<b:skin><![CDATA[]]></b:skin>
<style type='text/css'>
#header-wrapper{
background:#333;
height:120px;
width:1000px;
}
#header-inner{
padding-left:30px;
}
#header,.title2{
text-align:left
}
#header h1,.title2{
font-size:50px;
font-weight:500;
color:#fff;
margin:0;
padding:20px 10px 0 0;
}
#header a,.title2 a{
color:#f60;
text-decoration:none}
#header a:hover,.title2 a:hover{
color:#fff
}
#headerlogo{
float:right;
display:inline;
overflow:hidden;
}
#header .description{
color:#999;
font-size:10px;
letter-spacing:10px;
margin-top:-5px;
padding-bottom:50px
}
#outer-wrapper{
width:1000px;
margin:0 auto;
font-size:15px;
}
#content-wrapper{
width:1000px;
}
#main {
float: left;
width: 600px;
padding: 20px;
border-left: 1px solid #ddd;
}
</style>
</head>
<body>
<div id='outer-wrapper'>
<div id='header-wrapper'>
<b:section class='header' id='header' maxwidgets='1'>
<b:widget id='Header1' locked='true' title='blogernas (Header)' type='Header'>
</b:widget>
</b:section>
</div>
<div id='sidebar-wrapper'>
<b:section class='sidebar' id='sidebar' showaddelement='yes'>
</b:section>
</div>
<div id='content-wrapper'>
<b:section class='main' id='main'>
<b:widget id='Blog1' locked='true' title='Posting Blog' type='Blog'></b:widget>
</b:section>
</div>
<div class='clear'/>
</div>
</body>
</HTML>
Selanjutnya untuk mengatur tampilannya,
maka tambahkan kode CSS berikut tepat diatas kode
#main {
#sidebar-wrapper{
float: right;
background:#f1f1f1;
width: 350px;
}
.sidebar h2 {
padding: 10px;
font-size: 18px
}
.widget-content {
padding: 10px
}
float: right;
background:#f1f1f1;
width: 350px;
}
.sidebar h2 {
padding: 10px;
font-size: 18px
}
.widget-content {
padding: 10px
}
Sehingga total akhir kodenya akan menjadi seperti ini:
<?xml version='1.0' encoding='UTF-8' ?>
<!DOCTYPE html>
<HTML>
<head>
<b:skin><![CDATA[]]></b:skin>
<style type='text/css'>
#header-wrapper{
background:#333;
height:120px;
width:1000px;
}
#header-inner{
padding-left:30px;
}
#header,.title2{
text-align:left
}
#header h1,.title2{
font-size:50px;
font-weight:500;
color:#fff;
margin:0;
padding:20px 10px 0 0;
}
#header a,.title2 a{
color:#f60;
text-decoration:none}
#header a:hover,.title2 a:hover{
color:#fff
}
#headerlogo{
float:right;
display:inline;
overflow:hidden;
}
#header .description{
color:#999;
font-size:10px;
letter-spacing:10px;
margin-top:-5px;
padding-bottom:50px
}
#outer-wrapper{
width:1000px;
margin:0 auto;
font-size:15px;
}
#content-wrapper{
width:1000px;
}
#sidebar-wrapper{
float: right;
background:#f1f1f1;
width: 350px;
}
.sidebar h2 {
padding: 10px;
font-size: 18px
}
.widget-content {
padding: 10px
#main {
float: left;
width: 600px;
padding: 20px;
border-left: 1px solid #ddd;
}
</style>
</head>
<body>
<div id='outer-wrapper'>
<div id='header-wrapper'>
<b:section class='header' id='header' maxwidgets='1'>
<b:widget id='Header1' locked='true' title='blogernas (Header)' type='Header'>
</b:widget>
</b:section>
</div>
<div id='sidebar-wrapper'>
<b:section class='sidebar' id='sidebar' showaddelement='yes'>
</b:section>
</div>
<div id='content-wrapper'>
<b:section class='main' id='main'>
<b:widget id='Blog1' locked='true' title='Posting Blog' type='Blog'></b:widget>
</b:section>
</div>
<div class='clear'/>
</div>
</body>
</HTML>
Jika sudah, jangan lupa klik tombol Simpan template seperti dibawah ini.

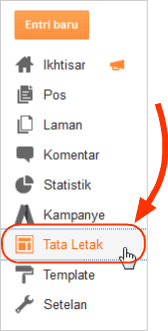
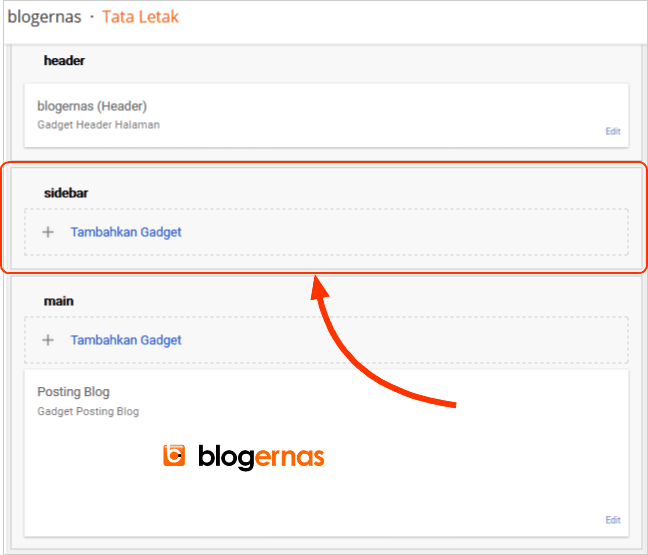
Lalu setelahnya, jangan lupa lihat dulu pada Tata Letak, apakah penambahan elemen sidebar ini sudah berhasil atau belum.


Jika pada halaman Tata Letak sudah muncul elemen Sidebar seperti gambar diatas, maka itu tandanya proses penambahan elemen sudah berhasil. Tinggal soal nanti adalah mengatur posisi sidebar tersebut pada blog anda. Apakah akan berada diatas, disamping kiri atau di samping kanan elemen main-postingan. Semua itu nanti bisa anda lakukan pada bagian CSS template anda.
(Jika ingin sekaligus menambahkan 2 kolom dibawahnya, maka anda bisa ikuti tutorial Cara Menambahkan 2 Kolom Dibawah Sidebar Blog)
Selanjutnya elemen apalagi yang perlu anda tambahkan pada template anda? Mari kita pindah ke halaman berikutnya: Cara Membuat Elemen Footer pada Template Blog dari Awal.


cara ngambil code gmana min?
BalasYa terpaksa disalin manual Putri Prince, karena blog saya anticopas
Balasmas kalau membuat template satu kolom bagaimana?
BalasKalau mau satu kolom, ya jangan dibuat element Sidebarnya. Kalau sudah terlanjur ada karena menggunakan template orang lain, ya hapus saja elemen sidebarnya
Balasaneh lo buat tutorial tapi kode nya gak bisa di salin
BalasIngat Marzep.com yang sopan ngomongnya
Balas